Weds 1/19 to Friday 1/21
Create Background in Vectr.com (2 parts)
Using the rough draft you have already designed, create your background in Vectr.com. If you are having issues with Vectr.com you can also create this in Photopea.com but Vectr will be easier for this.Part 1 Instructions:
- You will create the basic background for your Background
- Follow the short video tutorial
- You will be working in Vectr.com, make sure you are logged in so it saves your work
- If you have an interior, you need to create 3 walls and a floor in perspective
- If you have an exterior, you need to create a sky (maybe some clouds), your ground (grass or blacktop) etc.
- If you want to create more details - GO FOR IT!
- This should only take about a half hour
- Save your file so you can go back to it tomorrow
- Post JPEG to your blog for credit to the Google Assignment.
- Resources: https://youtu.be/9raEbBMHq4E - Create Landscape Illustrator Tutorialhttps://youtu.be/6T5Gnye83EA - Create Landscape Illustrator Tutorialhttps://youtu.be/navb6Y45gdQ - Create Empty Room Illustrator Tutorial
- (Adobe Illustrator tutorials are similar instructions in Vectr.com)
Part 2: Add Vector (SVG) Components to Your Background in Vectr.com
You are going to use a website where you can download free Vector images.
The website is: https://www.vecteezy.com/
- There are many steps, YOU MUST read carefully and work step by step
- Post FINAL background with components to your Google Classroom Assignment
Step 1: Adding Gradients to Your Background
- Tutorial on Gradients (in case you forgot)
https://youtu.be/bDXfEz2rsNM - You will open the file you created yesterday (your landscape or interior room walls) in Vectr.com
- You will add gradient colors to your landscape or to the walls in your interior room
- Save file.
- Make sure you select FREE VECTORS as your options. DO NOT click or use images that are under ISTOCK, those you would have to buy
- Search for the items you need, example: Tree, Couch, Clouds, Lamp, etc.
- Sign up with your School Google account - its free
- Select FREE Vectors in the search bar
- You can search for plants, furniture, trees, landscapes, office spaces, etc.
- Click on the image you want to download, make sure its the FREE option
- Click Free Download
- The file will download to your download files
- TIP: Look for single items, its easier than using items that are part of a big scene
- After you download your items, you will need to extract the files (see Video Tutorial below)
Step 3: Extracting ZIP files that you downloaded
- You will need to locate the zip file you download.
- Select the file and right click
- Select EXTRACT ALL
- The files will be in a new folder now. The file that is an Encapsulated Post Script (EPS) or AI file is the file you will convert to an SVG
Step 4: Converting EPS or AI files to SVG to be able to open in Vectr.com
- To be able to open your EPS or AI files in VECTR.com you will need to convert them to an SVG file.
- You can use an online program to do this easily. I used https://cloudconvert.com/ but if that is blocked for you, just search: "online convert EPS to SVG"
- In Cloudconvert.com > Click Red Box SELECT FILE, find your EPS or AI file
- Select CONVERT TO... and click SVG which is in the Vector option
- Click CONVERT
- A screen will pop up with your image, Select DOWNLOAD.
Step 5: Opening and adding your components to your background in Vectr.com
- Download the Vectr APP to your desktop or Chromebook https://vectr.com/downloads/
- I had memory issues because the file are large.
- Save your work as a SVG to your desktop as your working just in case it crashes, you don't want to lose your work
- In Vectr.com, open the file you created, the landscape or room interior
- Click the UPLOAD IMAGE tool (looks like a cloud with an arrow)
- Find and select the SVG file you just converted.
- Follow the steps in the tutorial to use the images
- You must included a minimum of (5) components you have downloaded. You can use more if you would like.
- Following instructions
- Creativity
- Neatness and Professional looking final piece
- Minimum of 5 SVG components added
- Perspective rules are followed (1pt or 2pt perspective)
- Gradient Background or detailed walls with shadows or details such as wallpaper
- Upload to google drive and post to blog by Friday, April 3rd, 5pts off for every day late.
- EXPORT final image as an SVG file and upload to your Google Drive - MAJOR assignments
- EXPORT as JPEG and Post to your Google Assignment
- THEN, ADD YOUR CARTOON CHARACTER, save as JPEG and Post to your Google Assignment (MAJOR GRADE)
RESOURCES: (Adobe Illustrator tutorials are similar instructions in Vectr.com)
https://www.vecteezy.com/ - Vector Image Resource
https://youtu.be/9raEbBMHq4E - Create Landscape Illustrator Tutorial
https://youtu.be/6T5Gnye83EA - Create Landscape Illustrator Tutorial
https://youtu.be/navb6Y45gdQ - Create Empty Room Illustrator Tutorial__________________________
Wednesday 12/16
Easy Pixlr.com Double Exposure Tutorial
Create a double exposure effect using Pixlr editor. In this quick double exposure portrait tutorial show you how to create a double exposure effect using several images, masking and layer modes.
- Download any 2 photos you find on the internet (school appropriate) or you can use photos you have taken.
- The photos should relate to each other in some way.
- You will creating this assignment in PIXLR.COM
- Follow the video Tutorial above (https://youtu.be/ieHAXDtcY1A)
- When complete - Post original 2 photos and your final photo to your blog for a MINOR GRADE
- Due Friday, Dec 18th by 6pm
- Message me with any issues.
__________________________________
Monday 12/14
"Elf on the Shelf Yourself"
- Create a new file in photopea.com, US Letter, 8.5 x 11, 300 dpi
- Take a selfie of yourself making the the ELF face - eyes looking to one side, little smile, no teeth
- Upload to Google Drive and download to your desktop
- Download a high res image of an ELF on the SHELF - you can your Google Images (Tools - Size - Large)
- I also recommend:
- https://twitter.com/elfontheshelf
- Copy your Elf image into your new document
- Open your selfie and isolate your face, keep some of your hair, and perhaps your ears, use your best judgment.
- Carefully clean-up your isolated head using selection tools, feathering, smudging, healing brush
- you can enlarge, lighten, change your eye color.
- Smooth your face - make it doll-like
- add some rosy cheeks
- Copy your head into your new file and place layer above Elf layer
- You will probably need to make a duplicate ELF layer and isolate the hat
- Move hat layer above your face layer - adjust
- Your final piece must be hi-res, it must be your face
- Save as PSD file and save as JPEG, PSD file goes in MINOR Assignments in Google Drive, Post JPEG to blog in MINOR
- Criteria:
- Smooth edges on the face
- the photo should look realistic
- Creativity
- Use of PS tools to create a clean professional final piece
- DUE Tuesday 12/15 by 3pm
_________________________________________
Thursday 12/10
JFKMHS Bumper Sticker Design
Due Friday 12/11 by 5pm
You are going to design a bumper sticker for JFK Memorial High School!
- Design a bumper sticker for the students of JFK Memorial High School.
- Research - GOOGLE image search "High School Bumper stickers" to help you get some ideas - BUT create your own!
- In Photopea.com or Vectr.com, Create a NEW document
- Size: W = 10” and H = 3” (in landscape position) with dimensions for your rectangle being .
- Use school colors and add vector or PNG items you have researched online or create your own
- You can create the bumper sticker to support a specific sport or program that is offered at JFK, if you would like.
- Download the JFK logo(s) from this page (right click, save image as), you don't have to use it but you can if you’d like or you can use components of it, such as the Mustang.
- Full color background - BE CREATIVE!
- Don't leave your text too close to the edge
- When complete, save file to your layered file to Google Drive and POST a JPEG to your Blog. MINOR GRADE
- DUE FRIDAY 12/11 by 3pm
Friday, 12/4 - New Assignment Research and Design
You will be creating a NEW animal-creature-beast-being!! You will use your mad Photopea skills to combine 3 or more animal photos as seamlessly as possible using the following tools and techniques:
-Selection tools
-Filters
TODAY:- Research which animals and landscapes you will be using for this project.
- Draw a ROUGH DRAFT of your new animal and tell me about it and its environment. (3-5 sentences)
- POST TO Google Classroom
- DUE TODAY Friday 12/4 by 3pm
On your final new beast combination, you will be evaluated on:
You will be creating a NEW animal-creature-beast-being!! You will use your mad Photopea skills to combine 3 or more animal photos as seamlessly as possible using the following tools and techniques:
-Selection tools
-Filters
-Filters
-Scale, rotate, distort
-Color Adjustments
TODAY:
- Research which animals and landscapes you will be using for this project.
- Draw a ROUGH DRAFT of your new animal and tell me about it and its environment. (3-5 sentences)
- POST TO Google Classroom
- DUE TODAY Friday 12/4 by 3pm
On your final new beast combination, you will be evaluated on:
- Matching of body parts (Selection tools, Scale, Rotate, Flip, Distort)
- Matching of colors (Hue/Saturation, Color Balance)
- Blending Techniques (Eraser, Blur, Smudge, Clone Stamp…including various opacities and settings)
- Creativity/Originality
Monday, 11/30
Assignment: Twinning - THE PHOTOSHOOT
What would it look like of you "twinned" with another person in your household?
- Take a photo of someone in your house and take one of you.
- Pose for the photos with the white background, match the pose, face straight forward, like you are taking a passport photo.
- POST both photos in Google Classroom Assignment
Tuesday, 11/24
Assignment: Mutant Me (Final Due Monday, Nov 30th by 3pm)
The overall concept is to use your ninja-like Photoshop (Photopea.com) skills to mess with your own head. Your goal is to generally keep it within the realm of believability. You want to fool the eye. You want the viewer to wonder how you did it because your Photoshop skills are so good that they are nearly invisible.
WARNING!!! THIS IS TO BE CREATED IN PHOTOPEA.COM ONLY!! DO NOT USE ANY SOCIAL MEDIA FILTERS |
Use a wide variety of skills show below. Combine skills and techniques. I'm not requiring a certain amount of skills per attempt...but for those of you who like to count, then be sure that you don't turn in anything with less than 3 techniques/tweaks/skills.
- Take your selfie on a plain background (white works best)
- get someone in your house to help you take your photos, a selfie will give you more work.
- take the photo from your shoulders up, facing forward
- You MUST submit 4 mutants of yourself.
- Post ALL 4 Mutants
- Get creative!
In the end, you will submit 4 Mutants, and let me know which ones are your 2 BEST mutants.
Identify your favorites and write 3-5 sentences why they are your most successful mutants.
YOU MUST UPLOAD YOUR PHOTOPEA FILES TO GOOGLE. I WILL BE CHECKING YOUR WORK.
YOU MUST UPLOAD YOUR PHOTOPEA FILES TO GOOGLE. I WILL BE CHECKING YOUR WORK.
"A" projects demonstrate "A" level content, skill, effort, initiative, and craftsmanship.
Monday, 11/23
Photo Collage due by 7pm
Photo Collage
Assignment – Create a Themed Photo-Collage
- The content of your collage should focus on one particular object. You can choose your own theme, some examples are:
- Maybe a collage of all…animal patterns, buttons, or hands types of watery surfaces, types of flowers, Sports equipment, Eyes,Hair styles, etc.
- Any topic you might be interested in for hobbies, like sneaker collecting, fashion, beauty
- In Photopea.com, create NEW document:
- Size: 10” wide by 8” high (horizontal rectangle)
- Resolution: 150 dpi
- Research and download images, remember to look for high res images with no watermarks
- You will need 8 - 10 different images (minimum)
- Combine your images in your document, use masking techniques, shadows, stroke, frames, and filters to create an eye-catching piece of art.
- Create a new layer for each new image that you add to your Collage. It is very helpful to name each layer so you can be organized with your images. To change the name, double click on the layer you want to rename.
- You will need to scale your images to into your working area.
- Select the layer of the image that you want to scale.
- Use the handles in the corner of the image to adjust the size of the image.
- REMEMBER - When you scale an image you must hold down the SHIFT key or your image will be out of proportion.
- Drag the corner of your image in or out to resize your image.
- You can convert some of your images to Black and White
- Use different contrasts, colors, and blending options.
- When complete, save your work as a .psd file and upload to your Google Drive
- SAVE as a JPEG and POST to your Blog - MINOR GRADE
Thursday 11/19
COMPLETE Coffee Cup Tutorial First, click on link below photo of coffee cup.
Post JPEG to Google Classroom Assignment when complete.
THEN, complete the following:
Once you have photographed your bottle:
https://blog.pixlr.com/place-an-image-onto-another-image-quickly-and-easily/
- You will add your label onto your bottle, using the same techniques you used on the coffee cup tutorial.
- Keep your background white.
- Upload your layered file to your Google Drive
- Post a JPEG to your Blog.
- Write 2-3 sentences about your final product. Was it successful? What would you change? What do you like about it.
- Please put your post to you MAJOR assignments on your blog by Friday 11/20, 3pm
_______________________________
Weds, 11/18
https://www.volusion.com/blog/how-to-create-high-quality-product-photos-with-your-smartphone/
- You must use a white background.
- Make sure your product shot is a straight on view (not on an angle)
- Use the highest resolution setting on your phone.
- Do not download a photo of the product from the internet, I want you to take the photo. I will know the difference.
- Post the NEW product photo in Google Classroom Assignment.
- DUE TODAY by 3pm
____________________________
Monday, Nov. 16th
Today you will create your label, you can choose to make it in Photopea.com or Pixlr.com, whichever you like working with better
Here's a good tutorial to help you with laying out your label
Instructions:
- Measure the bottle or container area you will be designing a new label for. You want your label to about the same size as the current label it has is.
- You will make a NEW file with those dimensions.
- Follow your rough draft
- Use fonts that match the theme of your bottle
- Add the product info you have "invented" for your new product. You don't want to copy the same thing it already is
- Make sure you add the volume size of your product (i.e. 00 fl oz.)
- You can use photos or images you find on the internet (like the tutorial does) but make sure you search for PNGs or remove the background on the images.
- Save layered file and upload to your Google Drive.
- Save as a JPEG and Post to Google Classroom Assignment.
- Due by 5pm on Tuesday.
_____________________________________
Thursday, Nov. 12th
Today you are going to design a new product that you will, in the next few days, develop a marketing plan, design the branding packaging, and create a commercial for.
TODAY: Look around your house and find a bottle of something you have. It can be a beauty product like perfume or shampoo or you can choose something from your kitchen, like a bottle of olive oil, or maybe it's a cleaning product or even laundry detergent.
Look for a bottle/container that you find interesting.
- take a photo of the bottle you chose, post to your BLOG
- with your Blog Post, tell me about your product - what is it used for, why is it the BEST NEW product (you can make it all up) 3-5 sentences minimum
- on Paper, with pencil, design your new product
- Include a "logo" - research fonts online - your Rough Draft should have a good representation of what your logo would look like - not just a quick sketch
- Design what the label would look like, what information would it include: Size, contents, description
- Choose a color scheme: You DO NOT have to color your drawing but list the color details and other info you want on your label
- POST a photo of your ROUGH DRAFT to your blog. (Minor Grade for all 3 parts, product description, photo of bottle and photo of Rough Draft) DUE TODAY!
DUE: 5pm today!
________________________________
Monday, November 9th
Today we are going to try a different photo editor since a few of you are having issues with Photopea.com.
Click: ADVANCED PILXR E
In upper right hand corner > click LOG IN
>click: Not a member yet?Sign up here
Make a new account
Watch the following tutorial about the tool bar in this application. Complete Tutorial below and POST to your BLOG (due TUESDAY 11/10 by 3pm)
Thursday we will begin a 6 part project that you will need to know how to create this effect.
 |
CARTOON BATHROOM CHAOS - BANKSY STYLE
During quarantine, last spring, famous and elusive street artist "Bansky" also being stuck at home, created this great piece of art. His insta caption reads: "My wife hates it when I work from home."
I think you can take inspiration from Bansky and use your amazing photo editing skills and create your own "Havoc" Bathroom. Of course, I don't want you to paint your bathroom, so use Photopea.com and start creating!
Instructions:
- Take a photo (or 2 or 3) of your bathroom. Arrange items to add to your story/composition you are creating. (take the opportunity to be nice and tidy the bathroom up after your photo shoot)
- Research images of cartoon characters you like, find one or 2 characters in several different poses
- Try and use PNG files or ones with translucent backgrounds, if not, you will need to remove the backgrounds
- In Photopea, place, resize, wrap, and compose ONE image with a minimal of 6 characters running amok in your bathroom.
- Grading: Neatness, Creativity, Overall composition
- Upload layered files to your Google Drive
- Post a before pic and after pic to your BLOG
- DUE: Friday, 10/30 at 9pm
- Minor Grade
Here are some examples of student work to inspire you:
——————-
Wednesday 10/21/2020
- Your assignment today is to make-up any missing assignments.
- If you don't owe me anything, you only have to complete attendance today.
- CHECK GENESIS, email me with any issues, if you have a ZERO its because I can not see your work on your blog.
- Your paint by numbers - if you received a 50 its because you only completed 1 - you need to do 2 of them.
- Have a great day!!!
Friday, 10/16: Step 2, "What I Want You to Know About Me" Photo Collage
We will be using a website called Wordclouds.com. A word cloud is a design that makes the most frequently repeated words larger and the less frequently repeated words smaller. It eliminates punctuation and words like 'to' 'and' and 'the' so that it can focus mainly on the words that give your text meaning. Because of the quotes you selected your word cloud will look different from every other word cloud in the class.
Click Paste/Type
A dialogue box will appear. Copy and paste all your quotes together into the dialogue box and click 'Apply'. I recommend you type one after the other, no paragraph spaces in between.
Click on 'Shape' and pick a simple square or rectangle for this project.
Throughout this lesson, you will be using various web based applications. In every case, these applications will allow you to do more things if you create a free account.
You will also be using a site called Background Burner. It also works best if you log in with Google. You won't be using these websites until later but take a moment to create your accounts now, so that you do not forget.
Thursday & Friday 10/8 & 10/9
Examples of Project: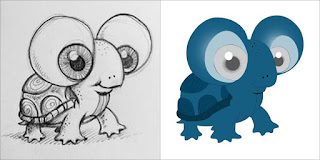
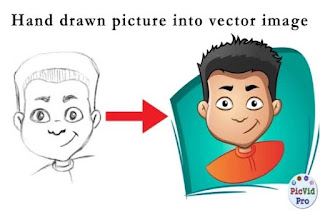
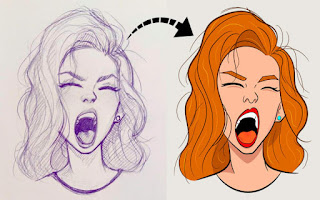
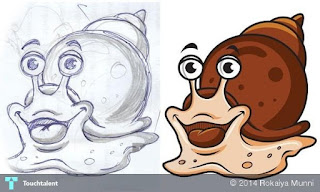
Your new image must include:
Click on 'Shape' and pick a simple square or rectangle for this project.
Choose a font that appeals to you. Play around with different fonts to find one you like.
Choose a color scheme. Play around with different color schemes to find one that appeals to you but remember that your word cloud is actually going to be the background for your final photo collage. If you wish to create an effective overall design, you will need to avoid bright and warm colors. Cool or neutral colors work best. I chose a gradient of cool colors.
OPEN PHOTOPEA.COM
- Create NEW document
- Size: 8 inches x 8 inches
- 200 dpi
- Transparent Background
- Open your WordCloud quote image
- Remove white background using magic wand
- Copy and paste
- click control + A (SELECT ALL)
- control + C (COPY)
- go to your new 8 x 8 document
- click control + V (PASTE)
- Resize your words to fit the box,
- click EDIT > TRANSFORM > SCALE
- Hold the shift key as you change the size to keep the correct proportions.
- FILE >SAVE AS .PSD so you can continue working on this project on Monday
- SAVE as a JPEG and post to your blog by 6pm TODAY, Friday, 10/16
Thursday 10/15:
"What I Want You to Know About Me" Photo Collage
Today we will begin a new major assignment. I have set up the assignment in steps. Step 1 will start today. You will be given four class periods to do this project, but will need to use additional time on your own to complete it and submit it by the deadline.
This project is designed to help you develop Photoshop (or Photopea.com) skills and graphic design skills.
If you have Photoshop at home you may use it instead for this project. You may NOT use your phone or any other photo-collage app for this project.
This project is designed to help you develop Photoshop (or Photopea.com) skills and graphic design skills.
If you have Photoshop at home you may use it instead for this project. You may NOT use your phone or any other photo-collage app for this project.
You will also be using a site called Background Burner. It also works best if you log in with Google. You won't be using these websites until later but take a moment to create your accounts now, so that you do not forget.
Step 1: Inspiration Words and Images
- Now, go to the camera roll on your phone. Create a new album called 'Me'. Start adding photographs to the album that illustrate what you want your teachers and classmates to know about you.
- Try to pick photographs that you took or that others took of you.
- Avoid photographs that have any stickers added to them. Avoid photographs that have filters on them. When choosing these photos, think about:
- Things you care about
- Ideas that are important to you
- Things you are good at
- Things that you are interested in
- People in your life who inspire you
- Places that are meaningful to you
- People you love
- Now, email these photos to yourself 5 at a time. Do not upload them directly to your Google Drive, especially if you have an iPhone. IPhone uses a photo format that cannot be read on a Chromebook. When you email a photo it automatically converts to a JPEG format, which can universally be read and used on any device.
- Download the images to your Chromebook and then upload them to this assignment in Google Classroom. DO NOT hit submit. Your teacher will be able to see the images. Add a private comment explaining how the images represent you.
- Next, gather together your very favorite quotes. Copy and paste them all into a Google Doc. You may use song lyrics but please edit out any curse words. You may use Bible quotes (or quotes from any religious text), quotes from your favorite books, movies, TV show characters, comedians, video games or anything else that inspires you, as long as you delete any profanity.
- I picked lots of quotes from famous artists and a quote from a science fiction writer.
- Submit your photos and word doc in Google Classroom for a minor grade
- DUE today 10/15/2020 by 5pm
Tues. & Weds. 10/13 & 10/14
PHOTO LOGO ASSIGNMENT Instructions: - You will create a PHOTO LOGO with Your Name
- Download two (2) images, 1 of YOU or YOU & YOUR FAMILY (yes, you have to) and one about something you like.
- Follow the tutorial video and make your own Photo Logo
- In the text section (see video) you will write your FIRSTNAME LASTNAME
- Be Creative, choose a FONT that looks interesting and is legible. Add drop shadows, strokes, any filters you would like.
- You will be graded on:
- Following instructions
- Neatness
- Professional looking final piece
- Creativeness
- Turning in on-time
- When complete, EXPORT as PNG and Post to your Blog
- Due by 5pm Wednesday 10/14 - Post to your blog MINOR Assignments
- Following instructions
- Neatness
- Professional looking final piece
- Creativeness
- Turning in on-time
Introduction to PHOTOPEA.com
After we discuss the software we will be using that is similar to Photoshop, you will be "paint by numbers" the following masterpieces
Today, you will create (2) paint by numbers (download from Google Classroom)
Paint by Numbers Photopea.com (or Adobe Photoshop) Tutorial
Instructions:
- Download (2) two worksheets JPEGs from the choices available in your google Classroom assignment.
- Go to Photopea.com
- File > Open > Choose the location and file you want to work with
- Using the magnifying glass tool at the bottom of your toolbar, zoom in on the top of the page
- In the first box labeled (1), its says LIGHT BROWN (on my example, your choice might say another color). You need to select a LIGHT BROWN color.
- Double click the COLOR PICKER (at the bottom of the tool bar) and a new window will open, select the color you are looking for - CLICK OK
- Click on the RECTANGLE SELECTION TOOL (2nd tool from the top of the tool bar) and select the area in the box around the number 1 (see video demo)
- Go to you the PAINT BUCKET TOOL (11th tool from top of toolbar, it is also has the gradient tool, click on bottom right of tool to select Paint Bucket Tool (see video demo)
- Click in the area around the number 1, it will fill the space with the color you have in your COLOR PICKER.
- Its ok if the numbers are still visible (in the video I show you how to cover the number with color if you want, but not necessary)
- Now go to a each section that has the number 1 in it, with your PAINT BUCKET TOOL selected, click in the area, it will fill the area with the color in your COLOR PICKER
- Fill in all the boxes with the same number
- Move onto the next box number 2, and repeat the process
- If you need to re-select a color, you can use the EYE DROPPER TOOL (6th tool down from the top of your toolbar) to select the colors in the top boxes
- Complete your paint by numbers
- EXPORT as JPEG and POST to your blog in MINOR
- You must complete 2 Paint by Numbers.
Monday 9/21 - Using the Pen Tool in Vectr.com
You will watch the following tutorial on how to use the Pen Tool in Vectr.com
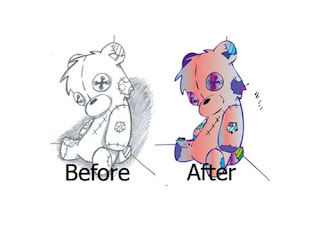
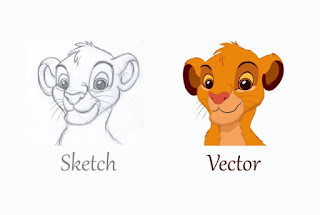
Once you have played around with the pen tool in Vectr.com you will use your new skills to re-create a on of your drawings by tracing it with the pen tool and using the basic shape tools you have already mastered.Assignment Instructions:
- On regular paper, draw a semi-simple drawing, it can be an illustration of an animal, an existing character, such as an anime character, or SpongeBob, a detailed flower or foliage, a fish, a mythical creature, as long it has some detail and some complex shapes.
- You will take a photo of your art and upload it to the Google Classroom Assignment labeled: STEP 1 Drawing (Minor Grade) Due by end of class Monday 9/20
- You will open your drawing in VECTR.com by selecting UPLOAD IMAGE (see yellow arrow below
- Select your drawing to upload, once its on your page, resize it to fit and fill your page.
- Select that image and on the layers panel, LOCK the image, so it won't move around while you are tracing it.
- Trace your image, using a combination of the Pen Tool and basic shapes to recreate your drawing. Be sure to color in the shapes, using Gradient tool, shadows, and high lights to make your illustration as detailed as you can.
- Once you have completed your new illustration, save it as a JPEG or a PNG file and upload it to your MINOR assignments page for a grade.
- Due 3pm Tuesday, 9/22
Examples of Project:


Friday, Sept 18th - VECTR.com
Use the following Instruction video on GRADIENTS to Create a NEW image of a landscape in Vectr.comYour new image must include:
- 3 shapes with gradients
- A foreground
- A background
- A middle ground
- Your landscape can be from another world
When complete, upload a JPEG to your MINOR Assignments on your Blog.
Write 1 Sentence explaining your landscape :)
Gradients: https://youtu.be/bDXfEz2rsNM


https://theethantopacio.blogspot.com/2020/09/creating-face-9172020.html
ReplyDeletehttps://vectr.com/djgadaniwtsdnjcom/a2f7o2CvEu
ReplyDelete